Understanding the Pins of a MIDI Cable
A MIDI (Musical Instrument Digital Interface) cable is a key component in electronic music, allowing different devices to communicate. Let’s take a closer look at the pins of a MIDI cable and their specific functions.
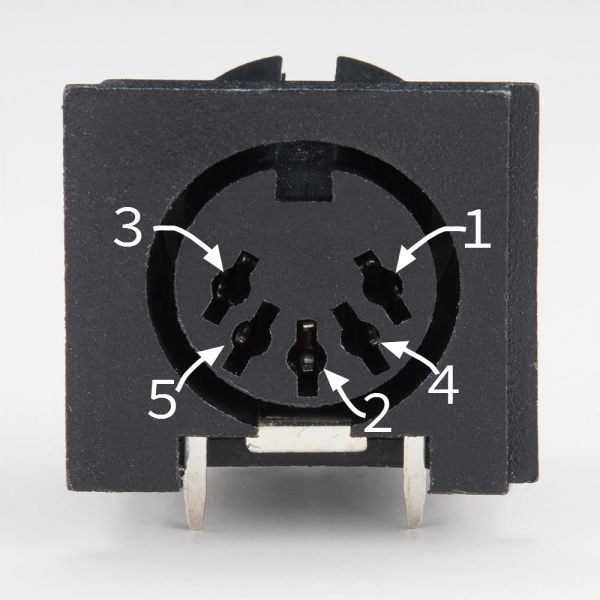
A standard MIDI cable has five pins arranged in a semicircle. Each pin has a distinct role:
Note that the pins on the connector are numbered out of order — it’s as if two more pins were added between the pins of a 3-pin connector. To help keep it straight, the numbers are frequently embossed in the plastic of the connector.
A MIDI cable is connected as follows:
MIDI Cable Wiring First Connector Cable Second Connector Pin 1 No Connection Pin 1 Pin 2 Shield Pin 2 Pin 3 No Connection Pin 3 Pin 4 Voltage Reference Line Pin 4 Pin 5 Data Line Pin 5 The spec defines a maximum cable length of 50 feet (15 meters).
Information above taken from this MIDI Tutorial: https://learn.sparkfun.com/tutorials/midi-tutorial/all
The combination of pins 4 and 5 allows for the transmission of MIDI data between devices, enabling the flow of information such as note on/off, pitch, and control changes.
Understanding these pin functions is essential for troubleshooting and ensuring proper connections between your MIDI devices. Proper grounding (pins 1 and 2) helps prevent noise and interference, while the data pins (pins 4 and 5) are crucial for accurate communication.
In summary, knowing what each pin of a MIDI cable does can help you set up and maintain your electronic music equipment effectively. Whether you’re connecting keyboards, synthesizers, or other MIDI-compatible devices, this knowledge ensures smooth and reliable performance.


