MIDI (Musical Instrument Digital Interface) is an essential tool in modern music production, allowing musicians to create, edit, and play complex compositions. However, since MIDI files only contain performance data (such as which notes to play and how), they don’t produce actual sound on their own. To share or finalize your music, you often need to convert MIDI sequences into audio files like WAV or MP3. Here’s how to do it.
Why Convert MIDI to Audio?
Converting MIDI to audio is useful for several reasons:
- Playback Compatibility: MIDI files require a compatible instrument or software to generate sound, while audio files can be played on any device.
- Preserving Sound: Audio files capture the exact sound as it’s produced, including effects and instrument choices, ensuring consistent playback.
- Sharing and Distribution: Audio files are universally accessible, making them ideal for sharing your music on streaming platforms or social media.

Methods to Convert MIDI to Audio
There are multiple ways to convert MIDI sequences into audio files, depending on your setup and tools. Below are some common methods.
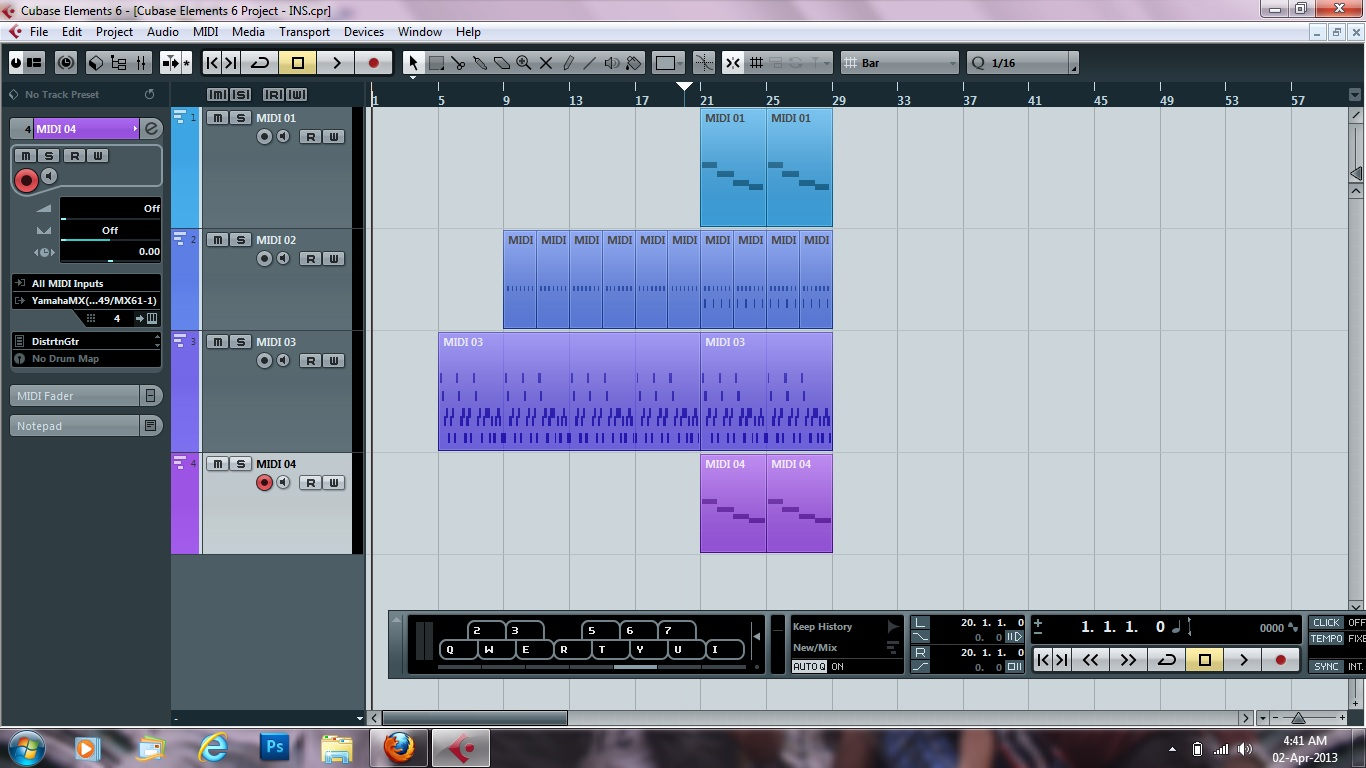
1. Using a Digital Audio Workstation (DAW)
Most DAWs allow you to export MIDI tracks as audio files. Here’s a general process:
Step 1: Load Your MIDI File
- Open your DAW and import the MIDI file.
- Assign virtual instruments to each MIDI track to generate sound.
Step 2: Add Effects and Adjustments
- Customize the sound by adding effects like reverb, delay, or EQ.
- Adjust volume and panning to balance your mix.
Step 3: Export as Audio
- In your DAW’s export menu, choose your preferred audio format (e.g., WAV, MP3).
- Render the MIDI performance as an audio file.
Popular DAWs:
- Ableton Live
- FL Studio
- Logic Pro
- GarageBand
- Cubase
2. Using a Virtual Instrument or Synthesizer
If you’re using a standalone virtual instrument or synthesizer:
Step 1: Load the MIDI Sequence
- Import your MIDI file into the software.
Step 2: Adjust Settings
- Choose your desired instrument sound and apply effects if available.
Step 3: Record the Output
- Use the software’s export function to save the audio, or record the output in a DAW.
3. Using MIDI to Audio Conversion Software
Some dedicated tools and online converters are designed for this purpose:
- MIDI to WAV Converter: A lightweight program for direct conversion.
- Online MIDI Converters: Websites that convert MIDI files to audio formats using built-in sound engines.
How It Works:
- Upload your MIDI file.
- Select your desired audio format.
- Download the converted audio file.
4. Recording External MIDI Instruments
If you’re using a hardware MIDI instrument (e.g., a synthesizer or drum machine):
Step 1: Connect the Instrument
- Use audio cables to connect your instrument’s output to your computer’s audio interface.
Step 2: Play the MIDI Sequence
- Send the MIDI data from your DAW to the external instrument.
- The instrument will generate sound based on the MIDI sequence.
Step 3: Record the Audio
- Record the instrument’s audio output in your DAW or using an external recorder.
- Save the recorded file as an audio format.
Tips for Better Results
- Choose High-Quality Virtual Instruments: The quality of the final audio depends heavily on the instruments used. Use high-quality virtual instruments or sound libraries for the best results.
- Optimize Your Mix: Before exporting, ensure that your mix is well-balanced. Adjust levels, add effects, and refine dynamics to achieve a professional sound.
- Export in High Resolution: If possible, export your audio files in lossless formats (e.g., WAV or FLAC) for the highest quality. You can always convert these files to compressed formats like MP3 later if needed.
Conclusion
Converting MIDI sequences to audio files is an essential step in producing and sharing your music. Whether you’re working in a DAW, using standalone software, or recording hardware instruments, the process is straightforward and ensures your compositions sound their best on any platform. By following the steps outlined above, you’ll be able to turn your MIDI creations into polished audio tracks ready for release.
 Three audio samples using the “Rock3 MIDI file” as the source.