Posted on Leave a comment

How Do I Convert My MIDI Sequence to Audio?

MIDI (Musical Instrument Digital Interface) is an essential tool in modern music production, allowing musicians to create, edit, and play complex compositions. However, since MIDI files only contain performance data (such as which notes to play and how), they don’t produce actual sound on their own. To share or finalize your music, you often need to convert MIDI sequences into audio files like WAV or MP3. Here’s how to do it.


Why Convert MIDI to Audio?

Converting MIDI to audio is useful for several reasons:

  1. Playback Compatibility: MIDI files require a compatible instrument or software to generate sound, while audio files can be played on any device.
  2. Preserving Sound: Audio files capture the exact sound as it’s produced, including effects and instrument choices, ensuring consistent playback.
  3. Sharing and Distribution: Audio files are universally accessible, making them ideal for sharing your music on streaming platforms or social media.

Methods to Convert MIDI to Audio

There are multiple ways to convert MIDI sequences into audio files, depending on your setup and tools. Below are some common methods.

1. Using a Digital Audio Workstation (DAW)

Most DAWs allow you to export MIDI tracks as audio files. Here’s a general process:

Step 1: Load Your MIDI File

  • Open your DAW and import the MIDI file.
  • Assign virtual instruments to each MIDI track to generate sound.

Step 2: Add Effects and Adjustments

  • Customize the sound by adding effects like reverb, delay, or EQ.
  • Adjust volume and panning to balance your mix.

Step 3: Export as Audio

  • In your DAW’s export menu, choose your preferred audio format (e.g., WAV, MP3).
  • Render the MIDI performance as an audio file.

Popular DAWs:

  • Ableton Live
  • FL Studio
  • Logic Pro
  • GarageBand
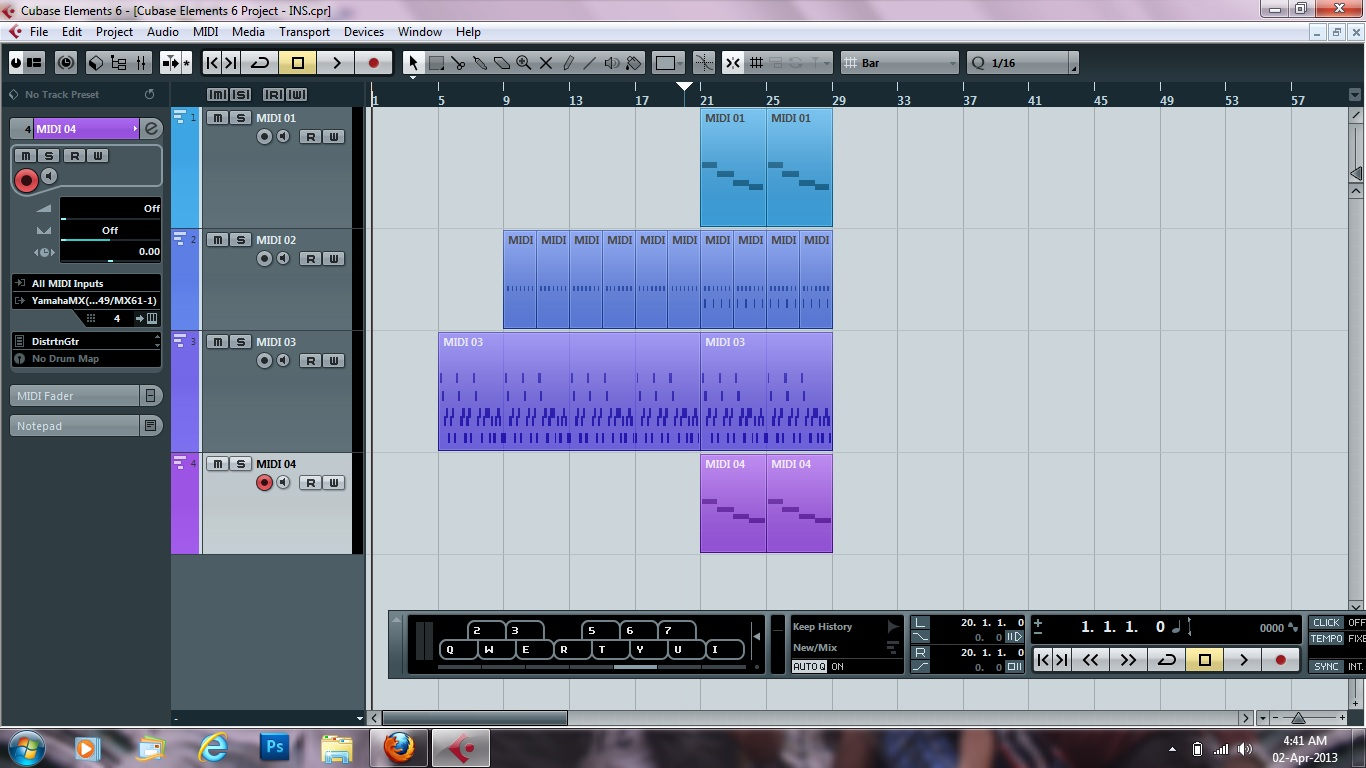
  • Cubase

2. Using a Virtual Instrument or Synthesizer

If you’re using a standalone virtual instrument or synthesizer:

Step 1: Load the MIDI Sequence

  • Import your MIDI file into the software.

Step 2: Adjust Settings

  • Choose your desired instrument sound and apply effects if available.

Step 3: Record the Output

  • Use the software’s export function to save the audio, or record the output in a DAW.

3. Using MIDI to Audio Conversion Software

Some dedicated tools and online converters are designed for this purpose:

  • MIDI to WAV Converter: A lightweight program for direct conversion.
  • Online MIDI Converters: Websites that convert MIDI files to audio formats using built-in sound engines.

How It Works:

  • Upload your MIDI file.
  • Select your desired audio format.
  • Download the converted audio file.

4. Recording External MIDI Instruments

If you’re using a hardware MIDI instrument (e.g., a synthesizer or drum machine):

Step 1: Connect the Instrument

  • Use audio cables to connect your instrument’s output to your computer’s audio interface.

Step 2: Play the MIDI Sequence

  • Send the MIDI data from your DAW to the external instrument.
  • The instrument will generate sound based on the MIDI sequence.

Step 3: Record the Audio

  • Record the instrument’s audio output in your DAW or using an external recorder.
  • Save the recorded file as an audio format.

Tips for Better Results

  • Choose High-Quality Virtual Instruments: The quality of the final audio depends heavily on the instruments used. Use high-quality virtual instruments or sound libraries for the best results.
  • Optimize Your Mix: Before exporting, ensure that your mix is well-balanced. Adjust levels, add effects, and refine dynamics to achieve a professional sound.
  • Export in High Resolution: If possible, export your audio files in lossless formats (e.g., WAV or FLAC) for the highest quality. You can always convert these files to compressed formats like MP3 later if needed.

Conclusion

Converting MIDI sequences to audio files is an essential step in producing and sharing your music. Whether you’re working in a DAW, using standalone software, or recording hardware instruments, the process is straightforward and ensures your compositions sound their best on any platform. By following the steps outlined above, you’ll be able to turn your MIDI creations into polished audio tracks ready for release.

Posted on Leave a comment

Do you sacrifice sound quality by going digital?

The debate between digital and analog music production is a longstanding one, with arguments on both sides regarding sound quality, convenience, and artistic expression. Whether producing digital music sacrifices sound quality compared to analog music depends on several factors, including the context, the listener’s preferences, and the quality of the equipment and processes used. Here’s a breakdown of the key considerations:

1. Sound Quality Differences

  • Analog Sound: Analog recording captures the continuous waveform of sound. Vinyl records and tape recordings are examples of analog formats. Proponents of analog argue that it provides a warmer, richer, and more natural sound, particularly because it captures subtle nuances and harmonics that some believe are lost in digital formats.
  • Digital Sound: Digital music is recorded and stored as binary data (1s and 0s). It involves converting the continuous analog signal into discrete digital data through a process called sampling. The quality of digital sound depends largely on the sample rate (how often the sound is measured) and bit depth (how much information is captured in each measurement). High-resolution digital formats can achieve very high sound quality, often indistinguishable from analog to the average listener.

2. Advantages of Digital Music Production

  • Precision and Flexibility: Digital music production allows for precise editing, manipulation, and processing of sound. Producers can easily cut, copy, paste, and alter audio without degradation in quality, which is difficult with analog.
  • Portability and Accessibility: Digital files are easy to store, share, and distribute. Digital audio can be streamed, downloaded, and played on a wide variety of devices, making music more accessible to listeners worldwide.
  • Consistency: Digital recordings do not degrade over time, unlike analog formats like tape, which can wear out or degrade with repeated playback.
  • Advanced Processing: Digital audio workstations (DAWs) and plugins offer powerful tools for sound design, mixing, and mastering, giving producers a vast array of creative options that are not possible with analog equipment.

3. Perceived Loss of Quality in Digital Music

  • Sampling Limitations: While modern digital recordings can capture audio at very high quality, there is still some loss of information during the analog-to-digital conversion process. For instance, when audio is sampled at 44.1 kHz (the standard for CDs), certain high-frequency details may be lost, though this is often imperceptible to most listeners.
  • Digital Artifacts: Poorly executed digital processing can introduce artifacts such as aliasing, quantization noise, or digital distortion, which can negatively impact sound quality. However, with high-quality equipment and careful processing, these issues can be minimized or eliminated.
  • Psychological Factors: Some listeners perceive digital music as “colder” or “less organic” compared to analog because of the way it is processed. This perception can be subjective and influenced by personal preference or familiarity with analog sound.

4. Hybrid Approaches

Many modern producers use a hybrid approach, combining the best of both analog and digital worlds. For example, a producer might record instruments using analog equipment to capture that warm, rich sound, and then use digital tools for editing, mixing, and mastering. This approach can provide the warmth of analog with the precision and convenience of digital.

5. Listener Experience

Ultimately, whether digital music production sacrifices sound quality is subjective and depends on the listener’s experience, preferences, and the listening environment. In many cases, high-quality digital music can sound virtually indistinguishable from analog, especially with advancements in digital recording and playback technology.

Conclusion

Producing digital music does not necessarily mean sacrificing sound quality. While there are inherent differences between analog and digital sound, each has its strengths. Digital music offers unparalleled flexibility, precision, and convenience, while analog can provide a unique warmth and character. The choice between analog and digital often comes down to the specific needs of the producer, the desired sound, and the preferences of the listener. Many modern music productions successfully combine both analog and digital elements to create the best possible sound.

Posted on Leave a comment

Rock42 – Audio Loops

Rock 42 MIDI and Audio LoopsThree audio loop conversions using the “Rock42 MIDI file” as the source MIDI.

Here are some examples of how converting MIDI Drum files into audio loops might sound. The MP3s below were all created from the same MIDI file, using different drum kits as their sound sources. This demonstrates the extreme flexibility of MIDI as a musical tool.

Rock-42 can be purchased in either one of these collections:
Rock MIDI Drum Beats Master Collection - MIDI Tracks

Browse and download more Free MIDI files here.

1. Rock-42 MIDI File using HipHop Drum Kit (110BPM)


2. Rock-42 MIDI File using a House Drum Kit (120BPM)

3. Rock-42 MIDI File using Techno Drum Kit (100BPM)

Download Rock-42 Source MIDI File

Posted on 2 Comments

Rock 3 – Audio Loops

Rock-3 MIDI Drum LoopThree audio samples using the “Rock3 MIDI file” as the source.

Rock-3 can be found in either one of these collections:
Rock MIDI Drum Beats Master Collection - MIDI Tracks

Browse and download more Free MIDI files here.

All 3 samples are at 120bpm

1. Rock-3 MIDI File with a RnB Drum Kit as the sound source

2. Rock-3 MIDI File with a Tight Drum Kit as the sound source

3. Rock-3 MIDI File with a Rockmaster Drum Kit as the sound source

Download Rock-3 Source MIDI File

Posted on 2 Comments

Sonic Producer – Create your own killer beats instantly

Along with providing a ton of MIDI Drum Files for people to download, I also like to search out and play around with new and different music software products.  Here’s one that I came across recently that I thought was pretty cool. It’s called “Sonic Producer” and it’s only about $30.

For those of you who like to make everything from scratch… Or those who like coming up with new musical style inspiration…  this one is for you. A powerful music/beat sequencer that has some amazing features. (and a very impressive price-point)

Basically, how it works is very simple.  As the software plays, you tap in the rhythms one track at a time. Then you can go back and add more and more instruments over the top of what you’ve already recorded making it as complex as you want. Very simple to use. And when you’re done you can export the finished product for use anywhere.

If you have every used the Re-Drum feature in Propellerhead’s Reason software… this is similar (except it doesn’t cost $500).

Watch the demo video …

Watch the Video above. Download it here.  Give it a shot.  Then come back here and let me know what you think about this attractive piece of music software. I would be very interested in your thoughts.

Key Terms:
make beats
produce beats
how to make beats
how to make rap beats
make instrumentals
produce instrumentals
produce rap beats
produce rap instrumentals
music production
produce music

music production software
beat making machine
online beat making
make beats online
make beats on the internet
make instrumentals online
produce rap beats online
music production machine
online drum machines

online beat maker
beatmaker
beat maker
beat making online
make beats with software
produce music software
music maker software
make music online
make instrumentals
beat machine

Posted on 2 Comments

How to convert YouTube videos to MP3 audio

It has come to my attention that many people out there are looking for instructions on how to convert YouTube Videos easily into MP3 files for your MP3 player.  I know this isn’t directly related to the MIDI topic, but it is one step further in my quest to find the perfect YouTube to MIDI converter.

So I looked at a bunch of different options.  Only two stood out to me as being good enough to mention. If you have any other suggestions, please mention them in the comments below. I would be very interested to hear your thoughts.

The runner up (not my first choice) would be the web site: www.video2mp3.netThe Good: It’s very easy to use. Just copy the URL link from the desired YouTube video and paste it into the form field on the Video2MP3 website, then hit “convert”. The Bad: There are some annoying Ad screens to wade through and the first time I tried it I got several pop-up spam screens (never good). The second attempt however, was pop-up free. They have two quality settings, normal and high. If you choose the high quality option you may need to stand in line. They have a Que system and it could take a while to get to you.  However, if you need an MP3 made from a YouTube video and won’t be doing this type of conversion very often, this is a solid option.

YouTube MP3 ConvertNext, and a better solution for me, is the FireFox plugin.  (found here) . The Good: You simply find the YouTube video you want to download as MP3 and click the “Download as MP3” button. Extremely easy.  THE BAD: It only works in FireFox, And you have to install 3 plugins before you can use it. The plugins are…

  1. Grease Monkey Plugin: Download Here
  2. Grease Fire Plugin: Download Here (optional but recommended)
  3. YouTube to MP3 Plugin: Download Here

However, if you have access to FireFox…  it is so easy. Plus, if you do use FireFox on any regular basis, you’re going to want the GreaseMonkey and GreaseFire plugins anyway. They are incredible enhancements to the overall browsing experience.

So, using the information I just gave you, within just a few minutes you too can have MP3 versions of your favorite YouTube clips.

Have another MP3 from YouTube conversion tip? Let us know in the comments below.