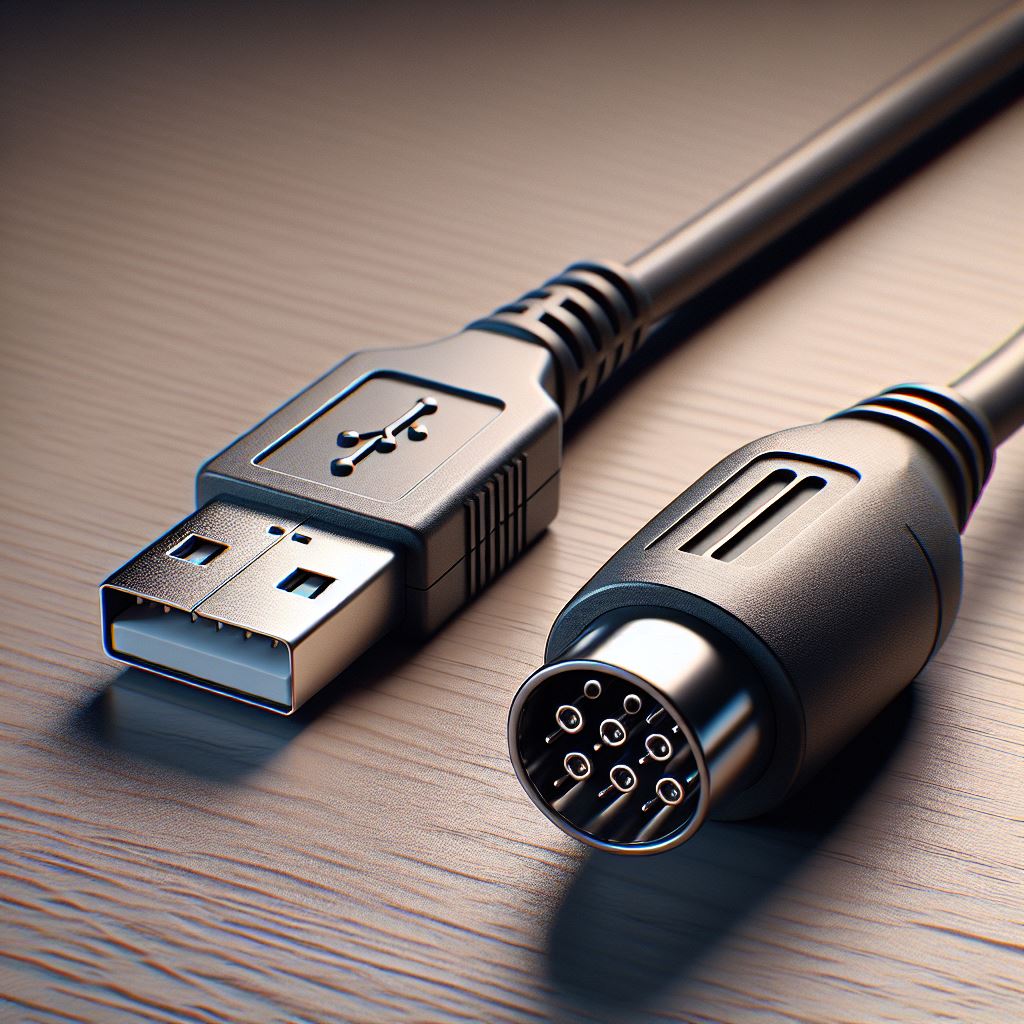
Posted on

The History of MIDI – “Hey, remember the 80’s”?

History of MIDIHere’s a couple of cool videos if you’re interested in learning, or in some cases “reliving” many of the key events and technology that made MIDI a standard in the musical world.

30th Anniversary of MIDI

Computer Music History – Apple Computer and Midi Interface (1987)

Posted on

Looptimus MIDI Controller, Great Looking New Kickstarter Project

UPDATE: The Looptimus is now in production and can be purchased here.

Looptimus USB MIDI Foot Controller Stomp boxes and foot pedals are standard gear for guitarists all over the world.  But for some reason that trend hasn’t caught on yet for keyboardists and computer musicians. Perhaps this little box will change that.

It’s called the Looptimus USB MIDI Foot Controller, and looks like it could add some pretty cool real-time functionality to live performance software. Designed to integrate with your computer through a USB MIDI interface this little box is configurable to navigate through sections of songs, start/stop, rearrange live sets, and much more I’m sure.

The Kickstarter project is going on NOW (Sept.10.2013), and they could use your support. Link: http://www.kickstarter.com/projects/loopcommunity/looptimus-usb-midi-foot-controller  This looks like a great new tool. If you do any LIVE performances with software, or you just want to help out a good cause, consider supporting this new venture.

FEATURES:

  • 20 Banks, A – F for each Bank
  • All-Access Bank for quick switching
  • 16 MIDI Channel Options
  • 1 Dedicated STOP button (single MIDI note)
  • 9 Rock-Solid, Momentary switches
  • USB MIDI connection
  • Expression Pedal Jack (for Roland Rv-5 or equivalent)
  • 3 Digit LED Display
  • USB Bus Powered!
  • 9v optional power jack
  • Aluminum Enclosure, Black powder coated
  • 6 ft. USB Cable included
  • 8×5″ x 5″ x 1.5″

Posted on

What is quantization?

imageFor musicians who work in recording or producing realm, quantization is an issue that comes up frequently. As for me, I deal with it on some level in almost every recording project I create.

So what is quantization anyway? Well, the long answer is “It depends on who you ask”.

  • An online dictionary will tell you:
    The process of converting, or digitizing, the almost infinitely variable amplitude of an analog waveform to one of a finite series of discrete levels.
  • Audio-technicians might tell you:
    Quantization is the process of converting a continuous analog audio signal to a digital signal with discrete numerical values. Example: In a compact disc, an analog recording is converted to a digital signal sampled at 44,100Hz and quantized with 16-bits of data per sample.
  • A physicist will tell you:
    To apply quantum mechanics or the quantum theory to something.

However, for a recording artist or musician, the meaning of quantization is a little bit different. I define it as: “Making music mathematically perfect.”

In other words, when a person plays a keyboard, drums, bass, sax, etc. into a recording device, the recorded performance usually lacks precision in timing to some degree. Although it may sound good, each note is likely not placed exactly in the correct spot in time. To record something with absolute mathematical precision would be nearly impossible for any human.

quantize

Enter Computers. So to compensate for the lack of timing precision, computers can come along behind us and make sure all of our timing is adjusted, lined up, and perfect. This is the act of quantizing.

Quantizing is done very easily when working with MIDI note data. Since MIDI notes each have a definite start and end time, all the computer has to do is recalculate the note data so that each note starts at the correct time and presto, you have perfect timing.

However, the process is not so straight forward when working with non-MIDI audio (voice, guitar, etc). When there is not a precise start time to the note, it is more difficult for quantizing software to know where to put each note in time. Waveform quantizing software has to basically guess where the individual notes are. As technology gets better, these programs are getting more and more accurate, but there is still some element of guesswork when trying to quantize waveforms.


The Quantizing Challenge

Nearly every recording software available today has a quantizing option built in and a ton of settings to go with it. The problem that many people fall into is that they think quantization will fix their timing problems in general. But let me be honest, if you can’t play with the beat at least to a pretty decent level of accuracy, don’t think the quantize button is going to fix it. For Quantize to work, you have to get the notes at least CLOSE to where they go in the timeline.

Most of the time you can choose if you want the computer to quantize the notes immediately as you’re recording, or later when you go back to edit. But either way you are going to tell the software you want to snap the notes to the nearest 8th note (1/16 note, 1/2 note, etc.), so you have to be a good enough player to be able to place the notes pretty close to the correct time. If you are too sloppy, you’ll have notes shifting to the wrong places and the final product will sound horrible.


The Quantizing Catch – Should we?

Now that we are on the same page as to what quantizing is and how to do it, the big question on everyone’s mind is “Should we even do it in the first place?” First you go through and play in your parts, and then go back and correct all your timing mistakes with quantization. After all, it does seem a little like cheating, doesn’t it? That actually is a very good question… “Should we?”

I think it comes down to personal taste and style. Computer music done for the electronica scene will not doubt be heavily quantized. In fact often the programs used for this genre don’t even give an option to shut off quantize. Country, blues, gospel, opera or classical would be expected not to use this timing correction process, but I’m sure many do.

I remember hearing a Bruce Hornsby song where there was an orchestra and of course a piano part over the top of what sounded like a very synthetic drum track. In that case, I would assume the drums were heavily quantized and the rest was probably not. But who knows.

Personally, I don’t mind the rhythm tracks (bass, drums, etc.) to be mathematically perfect, but I prefer the humanness of the main instruments. The slight timing nuances of the players gives the music more life for me. That why I prefer live music to recordings anyway. But being a computer music buff, I also appreciate the heavily quantized sounds of the industrial music scene as well.

Tell me what you think. Do you have any quantizing tips, tricks, or stories? What do you think sounds best?

Posted on

Two Keyboards is like Four Keyboards

peavey dpm3
peavey dpm3

I remember in college when I bought my first two-tier keyboard stand. It was great. I was so excited. Now all I needed was the second keyboard. Of course being a penniless, starving student didn’t allow for the extravagance of purchasing excess gear. So I went for what seemed like a really long time with just one keyboard.

At the time I had a Peavey DPM3, which was actually way more keyboard than I knew what to do with. I was completely overwhelmed by the thought of oscillators and envelopes and filters and modulators. But one thing I did know was that I had 16 MIDI channels to work with and only one set of keys. And this was a limitation that I was determined to overcome.

Although I only owned one keyboard, I knew that if I could get my hands on another one I could “MIDI them together” to access way more sounds (using different MIDI channels) than I could play with just the one keyboard. For example, in performance mode I could layer 5 sounds using MIDI Channels 1-5 and play those all with the main keyboard. Then using a second keyboard as a controller I could access another bank of 5 sounds on channels 6-10 without ever needing to change patches. So even though I was playing the two sets of keys, I would only trigger the sounds from the main keyboard.

It gets better. Using this logic, I determined that I could also do the same for the second keyboard, and at the same time. I could make my ‘main’ keyboard access the ‘secondary’ keyboard’s sounds as well.

Kawai k1
Kawai k1

So, with much begging, threatening, and bribing, I convinced my brother to loan me his Kawai K1 for the weekend and I tried it.

Not only did my experiment work…. I looked SO COOL doing it! In fact, I think my wife married me because of this. (Ahhh… But that’s a story for another day)

By hooking the two keyboards together with MIDI, I was essentially using two sets of sounds from one and two sets of sounds from the other, at the same time. That’s why having two keyboards is actually like four keyboards.

SIDE NOTE: Using this logic… Three keyboards would be like having nine. I have yet to try that one.

What do you think? Do you have any interesting ‘MIDI Chaining” stories to tell?

Posted on

FAQ

All of our midi files follow this format:
sect. A – fill 1 – sect. A – fill 2 – sect. B – fill 3 – sect. B – fill 4
Edit and loop to your hearts content !

How do I access these files?

There are two ways.  


Play them from your browser

    If you simply click on any of the file names located on our download page your browser will automatically download the file and begin playing the MIDI file.  This action does not save the file to your hard drive.  Most web browsers now days are equipped with a MIDI “plug-in” which recognizes the file(s) as MIDI and automatically begins to play them through your computer’s sound card and speakers. 
    The problem with this is that, in most cases, people have the stock sound card (which sounds horrible) that came with the computer.  So unless you have purchased a great after market sound card for your PC, these files probably sound a little weak.

    There are a couple of ways around this though.  

   ***  One is to get a software based MIDI synth. there are a bunch of them that you can buy, but there are also some really good ones for free. These software synths convert the MIDI data into ‘high quality’ musical sound (unlike most sound cards) and then pushes the music out your sound card. These are a great alternative to buying expensive MIDI equipment.

Here’s a list of some good software MIDI players
       http://aitech.ac.jp/~ckelly/midi/help/midi-players.html

Loopy – Great software!  and it’s FREE.

    Here are some others you might want to try out. (I have little or no experience with these.)     


    **** Another way is to buy an external MIDI sound unit. This is the route I go because the units are so much more editable and don’t take up precious computer RAM and CPU speed. Plus you can use them for other things if the need arises. 
    The MIDI data goes to this unit instead of through your sound card. That means you have to hook it up to your computer and have an external speaker source. (minor problems)
    I use a Korg NX5R unit: (click here for more information)

  This unit costs around $400 – $500 and is well worth it. It’s like having a studio Keyboard in a little box. 

    There are many different kinds of these modules that can be used with your computer.  Virtually every major keyboard has a rack mount, and module version that you can buy. 
    You can also use any MIDI compatible keyboard as your sound source. You don’t have to use a “little box”.

Download the files

    The reason I have these MIDI files available to download is not so much so that you can play them from your browser, but rather to download them into your computer for editing. This way you can use them as backing tracks for your songs or piece them together just for fun, or do what ever you want with them.

    You can download the files by clicking the RIGHT mouse button on whichever file you want to download. When you do this, a drop-down menu will appear. Simply select “Save File As….” and tell the computer where, on your hard drive, to save it.  Once it is saved you can import the file into any MIDI editing device or software where you can then use the file(s) however you want to.

    If you don’t have a software MIDI sequencer, here are some I can suggest. (There are MANY others)

    Cakewalk  –  EmagicOpcode

Q: Why do these MIDI files sound so bad?

A: The files don’t sound bad…..  Your sound card does!

And before you say “How Dare They….”, please read why we can say this with certainty. Click here! and read… “Play them from your browser”


     If you have other questions about downloading these files please let us know: Contact Us

Posted on

Using MIDI files with an external sound source

How to Connect MIDI Devices
Connect MIDI Devices

How to use these kinds of files in your keyboard and/or standalone midi sequencers.

What is a MIDI file?
MIDI is a means of communicating music information among synthesizers, keyboards, computers and other electronic sound equipment through digital messages. Unlike wave files, MIDI files do not contain any sound. Instead they contain commands that tell the receiving unit exactly what note to play, what sound it should be played with, how loud it is, and how long to hold the note on.

What this means is that when you get a MIDI file, you are getting a file that contains what the composer did on his keyboard. The file is fairly small because it contains no actual sounds or voice information. To play back this file you need either a keyboard with both a MIDI interface and a floppy drive or a computer with MIDI capable sound card.

Playing back a MIDI file.
Playing back a MIDI file is fairly simple to do. In most cases it is a matter of putting a disk that contains a MIDI file into the floppy drive of your keyboard, selecting the file to be played and playing it. Since MIDI is such a common standard, it truly is this easy.

Playing MIDI files is extremely simple, but getting the most out of the play back can take a little more work. Consider, for example, playing your MIDI file back on a PC with a standard sound card. You will quickly find that the sounds coming from your computer may be a little flat or lifeless compared when the same piece is played on a keyboard.

The reason for this is found in how sound cards work. Sound cards have a wave table IC that contains the sampled sound of many instruments. Due to the expense and work involved in sampling these sounds few standard sound cards contain sampled sounds that are even close to the quality found in most keyboards or sound modules.

A keyboard has been designed to reproduce high quality sounds. A sound card has been designed to produce sound, not necessarily “high quality”. So what can you do about this? The answer is simple, connect the MIDI output of your sound card, to the MIDI input on your keyboard, and set your computer to play the MIDI file out to the keyboard. Now when you play back the same musical piece, the keyboard will play it with its full sound compliment instead of using your low quality sound card sounds.

Also worth noting… there are available now, high quality sound cards with “synth” engines built into them. These cards are typically much more expensive than your average generic sound card though. Consult your local music store for more information about this.

How do I connect MIDI devices?
Connecting MIDI devices is a fairly simple task. The standard cable for MIDI is a 5-pin cable with a small round connector. This cable carries the digital commands from one unit to another.

To connect the MIDI devices start with the master unit. All MIDI units will have jacks labeled as IN, OUT and most have a THROUGH. Take a suitably sized MIDI cable and go from the OUT of the main unit to the IN on the slave unit. Then take a second MIDI cable and go from the IN of the first unit to the OUT on the slave unit. (Note: the Out from one unit cannot connect to the OUT of the other. This will not work. An OUT must always connect to an IN).

Now that the digital command links have been established you can begin to establish the audio connections. Start with the slave device and run a patch cable from the audio out to the audio input on your mixer or amp.

These simple connections are all that are required. Now you can use the main unit to cause any of the other unit(s) to play music as you see fit. Remember the shorter the cable run the better the signal quality will be. And it is not recommend to run more than 4 or 5 units in a MIDI chain as the signal can become weak and unstable.

Further details.
The exact details for playing back MIDI files on your keyboard, sequencer or drum machine will vary with different models. While the basic steps are usually the same, the best source of instruction is yours owners manual.

If your instrument has a disk drive, normally you would start by saving a MIDI file on a standard DOS formatted disk. After the file is saved, you insert the disk into the floppy drive on your digital instrument. Use the built in floppy drive controls to select the MIDI file on the disk and then select play.

Playing back a MIDI file on your PC may be slightly more complicated but still is very simple. The first step is to ensure that the MIDI drivers for your sound card or MIDI ports are installed and enabled. The information that came with your sound card will tell you how to this properly.

On a PC it is very common to use some sort of music editing software to play back or modify a MIDI file. Follow the manufacturer’s directions to install your music editing software and ensure that it works with your sound card.

Once the software and hardware are ready you can begin having fun. Insert the disk with the MIDI file into your PC’s floppy drive and open the file with your music editing software. The software will allow you to play or change the file as needed.

As you can see, thanks to industry standards, using MIDI files is fairly simple to do. You will be amazed with the possibilities that are opened up once you begin working with MIDI files.