How to Humanize Your MIDI Tracks: Making Music Feel Alive
MIDI (Musical Instrument Digital Interface) is a powerful tool in music production, allowing for precise control over musical elements. However, this precision can sometimes make MIDI tracks sound robotic or artificial. To bring a more natural, human feel to your MIDI compositions, here are some effective techniques to “humanize” your tracks.
1. Ease Up on Quantization
Quantization aligns your MIDI notes perfectly to the grid, which can make your music sound too mechanical. Instead of quantizing every note, try leaving some parts slightly off the grid. This mimics the natural timing variations of a live performance1.
2. Vary Note Velocities
In real performances, musicians don’t hit every note with the same intensity. Adjusting the velocity (the force with which a note is played) can add a dynamic range to your MIDI tracks. Randomizing velocities slightly can make your music sound more expressive and less uniform1.
3. Adjust Timing and Note Lengths
Small variations in the timing and length of notes can make a big difference. Slightly shifting notes forward or backward and varying their lengths can create a more organic feel. This technique, known as “MIDI note offsetting,” helps to replicate the subtle imperfections of a human performance2.
4. Use Humanization Tools
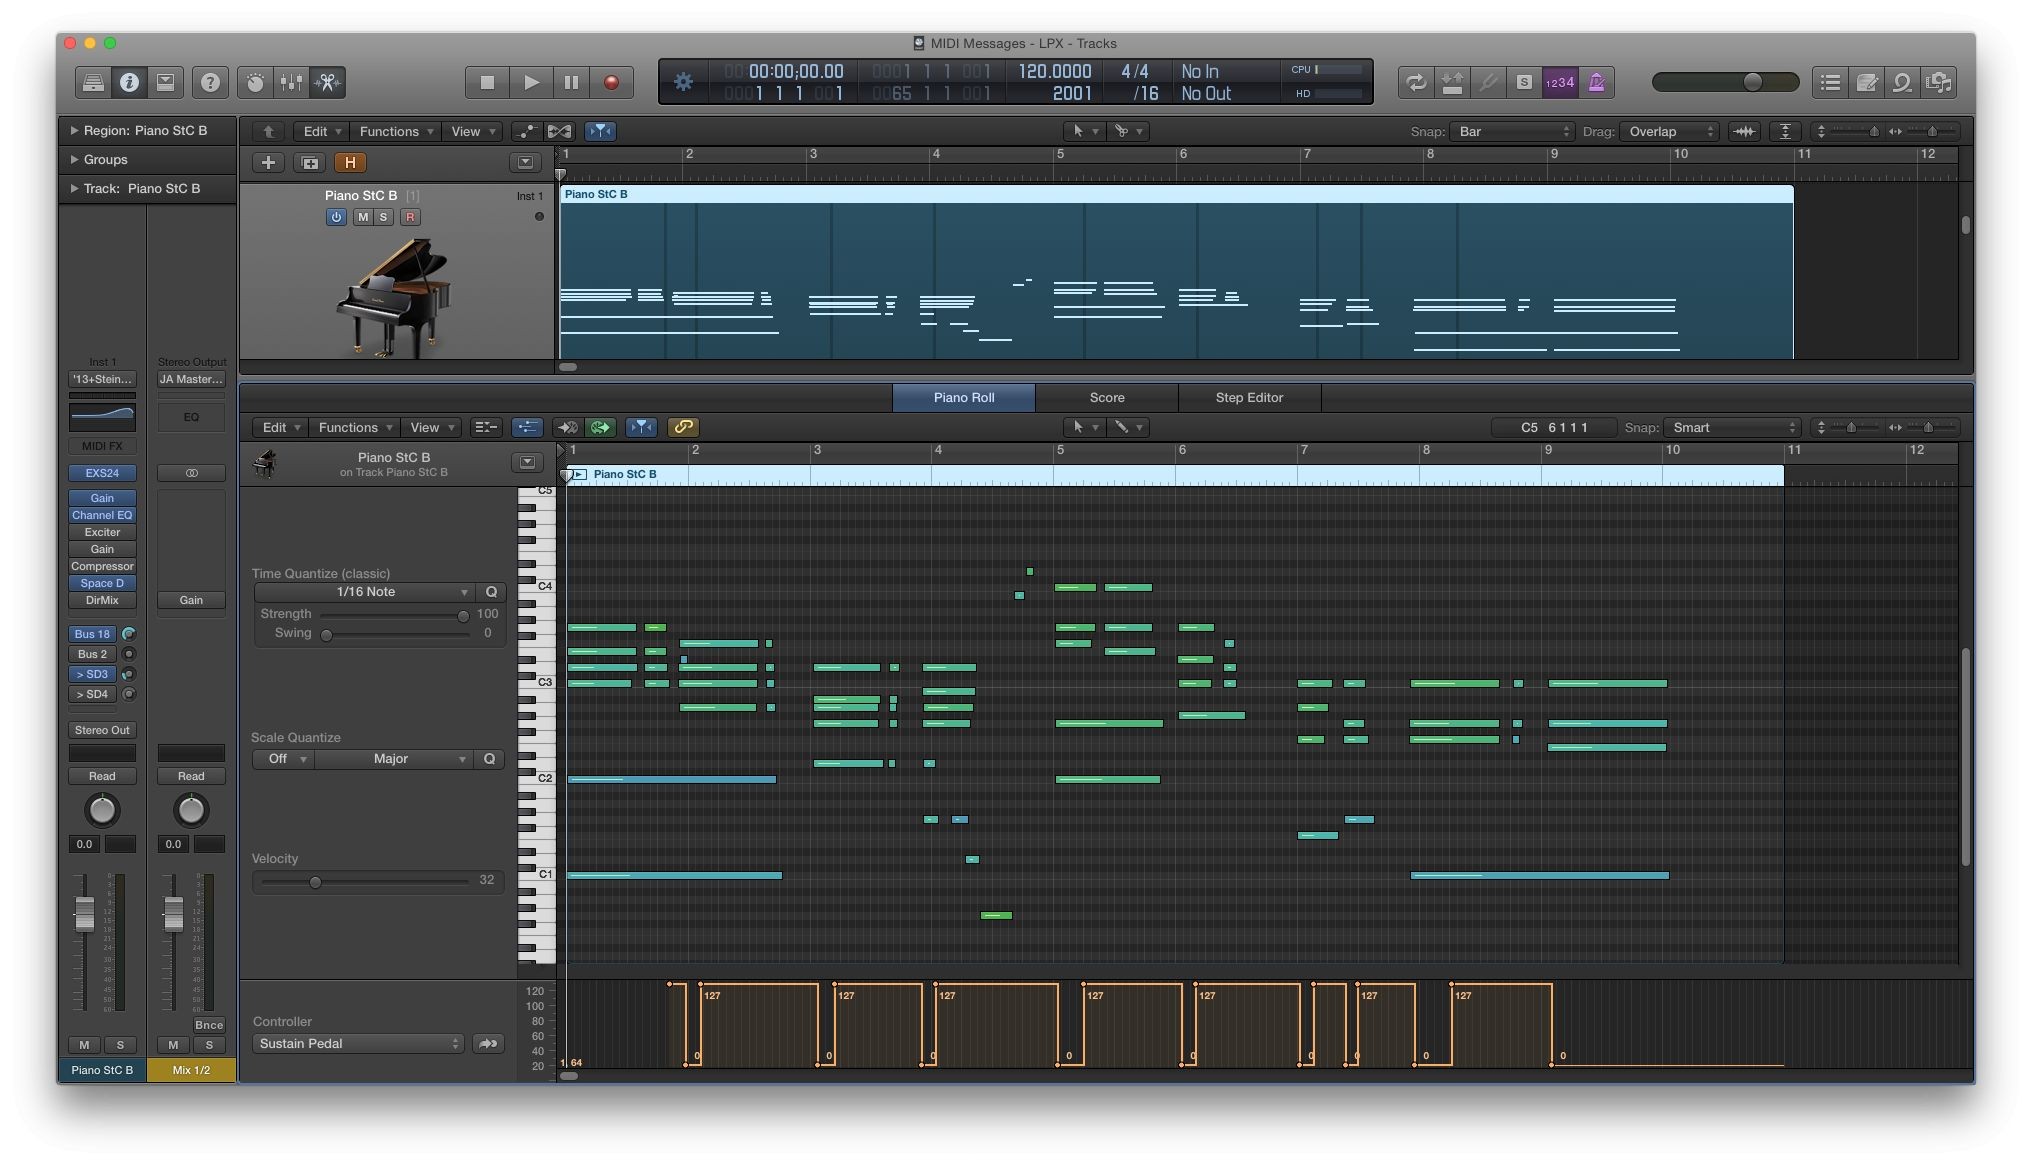
Many DAWs (Digital Audio Workstations) have built-in humanization tools. These tools can automatically introduce slight variations in timing, velocity, and note length. For example, in Logic Pro X, you can use the “Humanize” function in the MIDI Transform menu to add these variations3.
5. Incorporate Swing and Groove
Adding swing or groove to your MIDI tracks can make them feel more lively. Swing shifts the timing of certain notes to create a more relaxed, off-beat feel, commonly used in jazz and funk. Most DAWs have swing settings that you can adjust to suit your style2.
6. Layer with Real Instruments
Layering MIDI tracks with recordings of real instruments can add a layer of authenticity. Even if the real instrument is playing the same part as the MIDI, the natural variations in the live performance can enhance the overall feel of the track1.
7. Edit Attack and Decay
Tweaking the attack (how quickly a note reaches its peak volume) and decay (how quickly it fades away) can make MIDI instruments sound more realistic. Adjusting these parameters can help mimic the nuances of how a real musician would play1.
Conclusion
Humanizing your MIDI tracks is all about introducing subtle variations and imperfections that mimic a live performance. By easing up on quantization, varying note velocities, adjusting timing and note lengths, using humanization tools, incorporating swing and groove, layering with real instruments, and editing attack and decay, you can make your MIDI compositions sound more natural and expressive.
Experiment with these techniques to find what works best for your music, and enjoy the process of making your MIDI tracks come alive!