Posted on Leave a comment

How Do I Convert My MIDI Sequence to Audio?

MIDI (Musical Instrument Digital Interface) is an essential tool in modern music production, allowing musicians to create, edit, and play complex compositions. However, since MIDI files only contain performance data (such as which notes to play and how), they don’t produce actual sound on their own. To share or finalize your music, you often need to convert MIDI sequences into audio files like WAV or MP3. Here’s how to do it.


Why Convert MIDI to Audio?

Converting MIDI to audio is useful for several reasons:

  1. Playback Compatibility: MIDI files require a compatible instrument or software to generate sound, while audio files can be played on any device.
  2. Preserving Sound: Audio files capture the exact sound as it’s produced, including effects and instrument choices, ensuring consistent playback.
  3. Sharing and Distribution: Audio files are universally accessible, making them ideal for sharing your music on streaming platforms or social media.

Methods to Convert MIDI to Audio

There are multiple ways to convert MIDI sequences into audio files, depending on your setup and tools. Below are some common methods.

1. Using a Digital Audio Workstation (DAW)

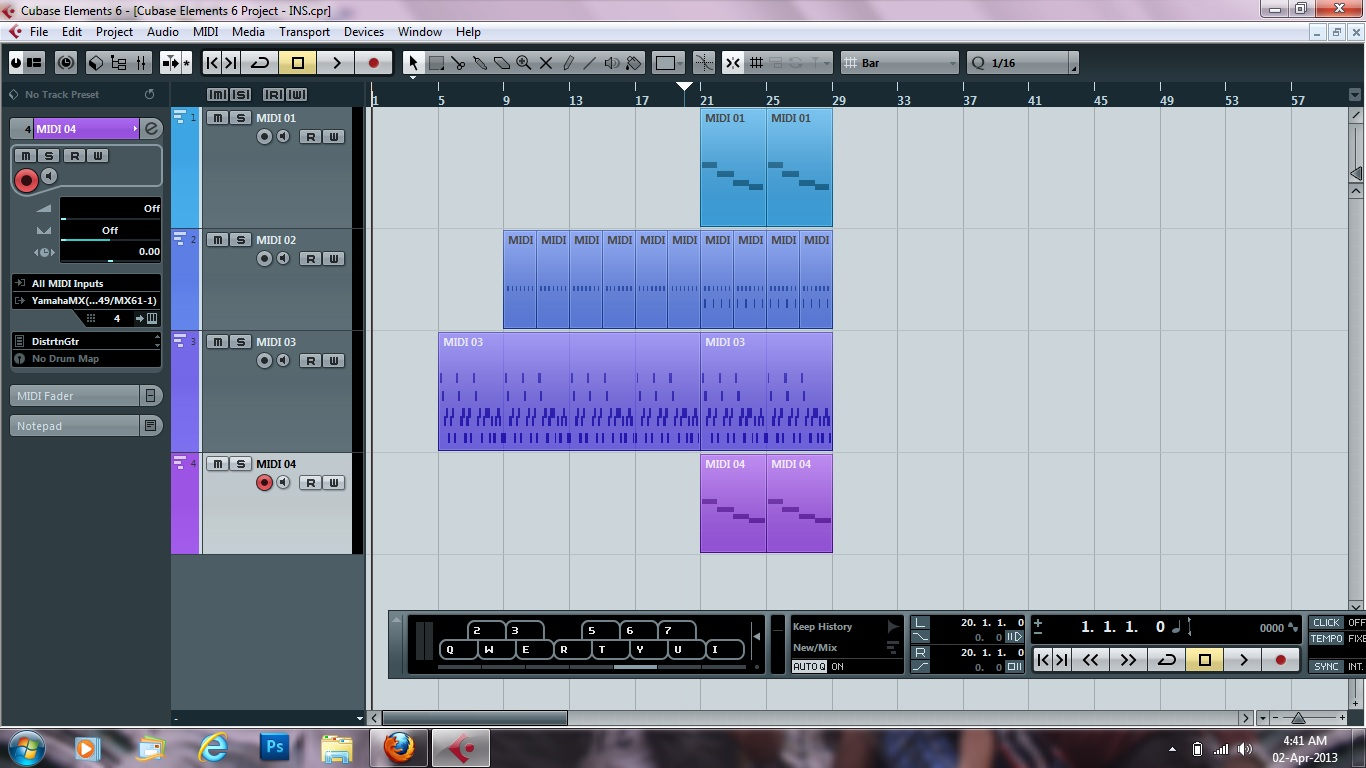
Most DAWs allow you to export MIDI tracks as audio files. Here’s a general process:

Step 1: Load Your MIDI File

  • Open your DAW and import the MIDI file.
  • Assign virtual instruments to each MIDI track to generate sound.

Step 2: Add Effects and Adjustments

  • Customize the sound by adding effects like reverb, delay, or EQ.
  • Adjust volume and panning to balance your mix.

Step 3: Export as Audio

  • In your DAW’s export menu, choose your preferred audio format (e.g., WAV, MP3).
  • Render the MIDI performance as an audio file.

Popular DAWs:

  • Ableton Live
  • FL Studio
  • Logic Pro
  • GarageBand
  • Cubase

2. Using a Virtual Instrument or Synthesizer

If you’re using a standalone virtual instrument or synthesizer:

Step 1: Load the MIDI Sequence

  • Import your MIDI file into the software.

Step 2: Adjust Settings

  • Choose your desired instrument sound and apply effects if available.

Step 3: Record the Output

  • Use the software’s export function to save the audio, or record the output in a DAW.

3. Using MIDI to Audio Conversion Software

Some dedicated tools and online converters are designed for this purpose:

  • MIDI to WAV Converter: A lightweight program for direct conversion.
  • Online MIDI Converters: Websites that convert MIDI files to audio formats using built-in sound engines.

How It Works:

  • Upload your MIDI file.
  • Select your desired audio format.
  • Download the converted audio file.

4. Recording External MIDI Instruments

If you’re using a hardware MIDI instrument (e.g., a synthesizer or drum machine):

Step 1: Connect the Instrument

  • Use audio cables to connect your instrument’s output to your computer’s audio interface.

Step 2: Play the MIDI Sequence

  • Send the MIDI data from your DAW to the external instrument.
  • The instrument will generate sound based on the MIDI sequence.

Step 3: Record the Audio

  • Record the instrument’s audio output in your DAW or using an external recorder.
  • Save the recorded file as an audio format.

Tips for Better Results

  • Choose High-Quality Virtual Instruments: The quality of the final audio depends heavily on the instruments used. Use high-quality virtual instruments or sound libraries for the best results.
  • Optimize Your Mix: Before exporting, ensure that your mix is well-balanced. Adjust levels, add effects, and refine dynamics to achieve a professional sound.
  • Export in High Resolution: If possible, export your audio files in lossless formats (e.g., WAV or FLAC) for the highest quality. You can always convert these files to compressed formats like MP3 later if needed.

Conclusion

Converting MIDI sequences to audio files is an essential step in producing and sharing your music. Whether you’re working in a DAW, using standalone software, or recording hardware instruments, the process is straightforward and ensures your compositions sound their best on any platform. By following the steps outlined above, you’ll be able to turn your MIDI creations into polished audio tracks ready for release.

Posted on Leave a comment

Difference Between MIDI Module and A Software Synth

The difference between a MIDI module and a software synth lies in their physical form, functionality, and the way they integrate with other musical equipment and production environments. Both are used to generate sounds based on MIDI input, but they serve different roles in music production.

MIDI Module

What is a MIDI Module?

A MIDI module, also known as a sound module or tone generator, is a hardware device that generates sound in response to MIDI data. It doesn’t have a built-in keyboard, so it requires an external MIDI controller (such as a keyboard or computer) to trigger the sounds.

Key Features of MIDI Modules:

  • Hardware-Based: MIDI modules are physical devices that often come with various sound libraries, ranging from pianos and strings to synthesized sounds.
  • Standalone Operation: They can operate independently of a computer and are often used in live performances or studio setups where reliable, hardware-based sound generation is preferred.
  • Preset Sounds: Most MIDI modules come with preloaded sound banks, often based on the General MIDI (GM) standard, as well as additional proprietary sounds.
  • Connection: MIDI modules typically connect to other devices via MIDI cables, though many modern modules also support USB and other digital connections.
  • Dependability: As hardware devices, MIDI modules are often prized for their reliability and low latency, making them suitable for live performances where stability is critical.

Examples of MIDI Modules:

  • Roland JV-1080: A popular rack-mounted sound module with a wide range of sounds.
  • Yamaha Motif Rack: A module version of the Yamaha Motif synthesizer series.
  • Alesis NanoSynth: A compact module offering a variety of sounds.

Software Synth

What is a Software Synth?

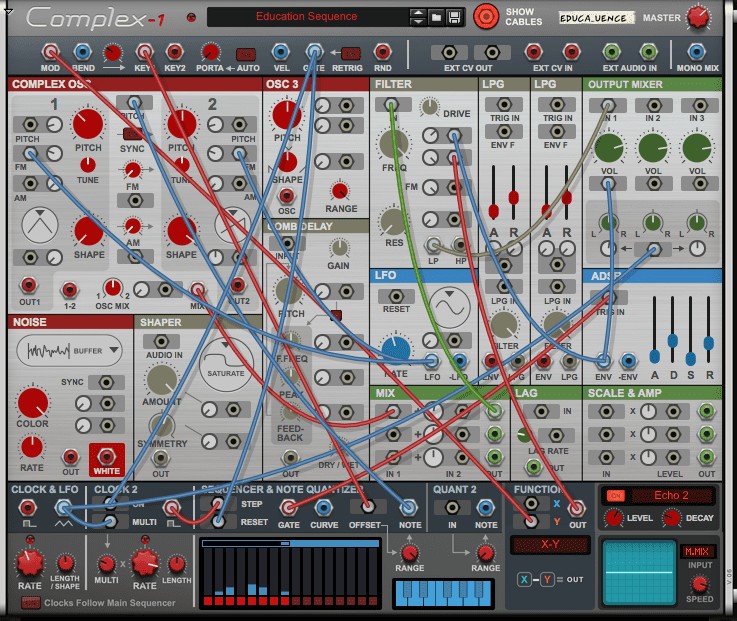
A software synthesizer, or soft synth, is a virtual instrument that runs on a computer or mobile device. It generates sound digitally and is controlled via a MIDI controller or directly within a digital audio workstation (DAW).

Key Features of Software Synths:

  • Software-Based: Soft synths are programs or plugins that operate within a DAW or as standalone applications.
  • Flexibility and Customization: They often offer extensive sound design capabilities, allowing users to create, modify, and save custom sounds.
  • Vast Libraries: Software synths can access massive libraries of sounds and samples, often far exceeding the capabilities of hardware MIDI modules.
  • Integration with DAWs: Software synths integrate seamlessly with DAWs, allowing for easy automation, effects processing, and multi-track recording.
  • Portability: Since they are software, soft synths can be installed on laptops or other portable devices, making them highly convenient for on-the-go music production.
  • Cost-Effective: Often, soft synths are more affordable than hardware MIDI modules, especially considering the vast range of sounds and features they offer.

Examples of Software Synths:

  • Serum by Xfer Records: A popular wavetable synthesizer known for its high-quality sound and visual interface.
  • Native Instruments Massive: A software synth widely used for electronic music production.
  • Spectrasonics Omnisphere: A comprehensive soft synth with an extensive library and powerful sound design tools.

Key Differences

  1. Physical Form:
  • MIDI Module: A physical, standalone hardware device.
  • Software Synth: A virtual instrument that runs on a computer or mobile device.
  1. Sound Libraries:
  • MIDI Module: Typically comes with preset sound banks, often based on the GM standard and other proprietary sounds.
  • Software Synth: Offers vast and often expandable libraries, with more flexibility in sound design and customization.
  1. Integration:
  • MIDI Module: Connects to MIDI controllers or other instruments via physical MIDI connections.
  • Software Synth: Integrates directly with DAWs and other software, often controlled via USB MIDI controllers.
  1. Latency and Reliability:
  • MIDI Module: Known for low latency and high reliability, making them ideal for live performances.
  • Software Synth: Dependent on the computer’s processing power; latency can vary, and reliability may be affected by system stability.
  1. Portability:
  • MIDI Module: Portable but requires additional hardware (MIDI controller).
  • Software Synth: Extremely portable, as it can be installed on laptops or mobile devices.

Why Choose One Over the Other?

  • MIDI Module: Ideal if you need a reliable, low-latency solution for live performance or prefer hardware-based sound generation. They are also a good choice if you want to avoid relying on a computer for sound production.
  • Software Synth: Best suited for those who require flexibility, customization, and seamless integration with a DAW. Soft synths are ideal for studio work, sound design, and situations where a vast array of sounds and effects is needed.

Conclusion

Both MIDI modules and software synths have their own strengths and are suitable for different applications. MIDI modules are reliable, hardware-based solutions favored in live settings, while software synths offer greater flexibility and integration in digital music production environments. The choice between the two depends on your specific needs, whether you prioritize portability, sound customization, reliability, or the breadth of available sounds.

Posted on 2 Comments

What MIDI Channel Should I Use?

Choosing the appropriate MIDI channels depends on your specific setup and the type of musical performance or production you’re working on. Here’s a breakdown of what MIDI channels are, how they work, and some general guidelines on which channels to use in different situations.

Understanding MIDI Channels

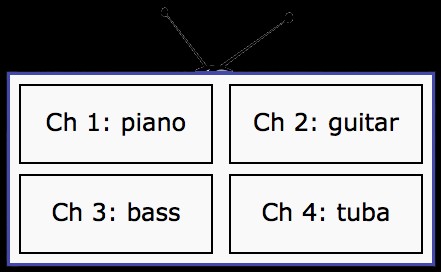
MIDI (Musical Instrument Digital Interface) uses channels to manage different instruments or parts in a composition. A single MIDI connection can carry up to 16 channels, each capable of transmitting a separate stream of MIDI data. This allows multiple instruments or parts to be controlled independently within the same MIDI system.

Common MIDI Channel Assignments

  1. Channel 1: This is typically the default channel for most MIDI controllers and instruments. If you’re controlling a single instrument, it’s common to use Channel 1.
  2. Channel 10: Reserved for percussion/drums in the General MIDI (GM) standard. Drum machines, drum kits, and other percussive instruments are often assigned to Channel 10.
  3. Channels 2-9, 11-16: These channels are usually available for other instruments or parts in your composition. You can assign different instruments or voices to each of these channels.

When to Use Specific MIDI Channels

  • Single Instrument Setup: If you’re controlling only one instrument, you can simply use Channel 1. In this case, there’s no need to worry about channel assignments unless you introduce more instruments or parts.
  • Multiple Instruments: When working with multiple instruments, assign each one to a different MIDI channel. For example:
  • Channel 1: Piano
  • Channel 2: Bass
  • Channel 3: Strings
  • Channel 4: Synth Lead
  • Channel 10: Drums (as per GM standard)
  • Percussion/Drums: Always use Channel 10 for drums if you’re following the General MIDI standard. Most MIDI drum kits and percussion instruments are designed to default to Channel 10.
  • Layering Sounds: If you want to layer multiple sounds to play simultaneously from the same MIDI input, you can assign the same MIDI channel to different instruments. For instance, assigning both a piano and a string sound to Channel 1 will allow you to trigger both sounds together.
  • Split Keyboard: Some keyboards allow you to split the keyboard so that different sections control different instruments. For example, you could assign the lower keys to Channel 2 (bass) and the upper keys to Channel 1 (piano).

Practical Tips for MIDI Channel Usage

  • Organize Your Channels: When working on complex projects with multiple instruments, it helps to organize your channels logically. For example, use Channels 1-4 for melodic instruments, 5-8 for harmonics or pads, and 10 for drums.
  • Avoid Overlap: Make sure that different instruments that are supposed to be independent are assigned to different channels. Overlapping channels can lead to unintended sounds or control issues.
  • DAW and Synthesizer Defaults: Some DAWs or synthesizers may have default channel settings. Be aware of these defaults, especially when connecting multiple devices, to avoid conflicts.
  • MIDI Channel Filtering: Some advanced MIDI setups allow you to filter or remap MIDI channels. This can be useful in complex live performance setups where you need to route specific data to particular instruments.

When to Use Specific Channels

  • Simple Home Studio Setup: For a basic setup with a few instruments, using Channels 1-5 for your main instruments and Channel 10 for drums is usually sufficient.
  • Live Performance: In a live setup with multiple MIDI devices, carefully assign each device to a unique channel to ensure that each instrument responds correctly to your performance.
  • Orchestration: For orchestral compositions or complex arrangements, use a systematic approach to channel assignment, reserving specific channels for different instrument families (e.g., strings, brass, woodwinds).

Conclusion

The choice of MIDI channels is all about organizing your MIDI data efficiently and ensuring that each instrument or part of your composition responds as intended. For most setups, using Channel 1 for your primary instrument and Channel 10 for drums is a good starting point. As you add more instruments or complexity to your setup, assigning each one to its own channel will help keep your MIDI data organized and easy to manage. Whether you’re working in a home studio, performing live, or composing an orchestral piece, thoughtful MIDI channel assignment is key to a smooth and successful musical workflow.

Posted on Leave a comment

How do I add lyrics to MIDI files?

Adding and storing lyrics in MIDI files is a feature supported by the MIDI standard, allowing lyrics to be embedded directly within the MIDI data. This can be particularly useful for karaoke applications, live performances, or any scenario where the lyrics need to be synchronized with the music. Here’s how lyrics can be added and stored in MIDI files:

1. MIDI Lyric Meta Events

MIDI files can store lyrics using Lyric Meta Events. These events are a part of the MIDI standard and are specifically designed to embed text, such as lyrics, into a MIDI sequence. Each word or syllable of the lyrics is associated with a specific time in the track, allowing them to be displayed in sync with the music.

  • Meta Event Type: The MIDI event type used to store lyrics is the Lyric Meta Event (0x05).
  • Text Data: The actual lyrics are stored as text data within these events.

2. Software for Adding Lyrics

To add lyrics to a MIDI file, you typically use a MIDI sequencing or editing software that supports Lyric Meta Events. Here’s how you can do it:

Using Digital Audio Workstations (DAWs)

Some DAWs and MIDI editing software allow you to add lyrics directly to a MIDI track. Examples include:

  • Cakewalk by BandLab: One of the most popular DAWs for handling MIDI lyrics. You can input lyrics directly into the MIDI track and align them with the corresponding notes.
  • Cubase: Another DAW that allows the addition of lyrics via the MIDI editor.
  • MuseScore: A free notation software that supports adding lyrics to MIDI files.

Steps to Add Lyrics in a DAW

  1. Import or Create a MIDI Track: Start by importing an existing MIDI file or creating a new MIDI sequence in your DAW.
  2. Access the MIDI Editor: Open the MIDI editor in your DAW to view the MIDI events. There should be an option to add or edit lyrics.
  3. Enter Lyrics:
  • In Cakewalk, for example, you would use the Lyric View to input lyrics, aligning each word or syllable with the corresponding note.
  • In MuseScore, you can select the note where the lyric should appear, and then type the word or syllable.
  1. Sync Lyrics with Music: Ensure the lyrics are synchronized with the music. Each word or syllable should be associated with the appropriate note, allowing it to display in time with the music during playback.
  2. Save the MIDI File: Once the lyrics are added and synced, save the MIDI file. The lyrics will now be embedded in the file as Lyric Meta Events.

3. Karaoke MIDI Files

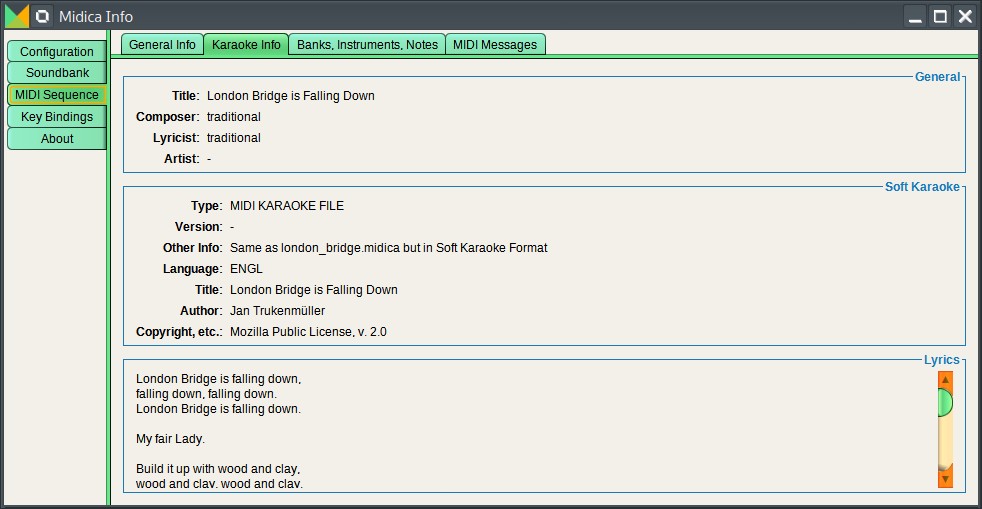
MIDI files with embedded lyrics are often used in karaoke systems. These files are typically referred to as MIDI-Karaoke or KAR files (MIDI files with a .kar extension).

  • KAR Files: These are specialized MIDI files that include lyrics and other metadata designed for karaoke systems. Many karaoke software programs support these files and can display the lyrics on the screen in sync with the music.

4. Playback of MIDI Files with Lyrics

To view and play back the lyrics embedded in a MIDI file, you’ll need a compatible MIDI player or software that can interpret and display the Lyric Meta Events.

  • MIDI Players with Lyric Support: Some MIDI players, such as vanBasco’s Karaoke Player, can display lyrics as the MIDI file plays.
  • DAWs: Many DAWs that support MIDI lyrics can also display them during playback, allowing you to see how the lyrics align with the music.

5. Considerations

  • Encoding: Ensure that the lyrics are encoded in a supported character set, usually ASCII or UTF-8, to avoid issues with special characters.
  • Timing: Precise timing is crucial when syncing lyrics with music. Pay attention to the placement of each Lyric Meta Event to ensure they display correctly.

Conclusion

Lyrics can be added and stored in MIDI files using Lyric Meta Events, making it possible to synchronize text with music for applications like karaoke or live performance. By using MIDI editing software or DAWs that support lyric entry, you can embed the lyrics directly into the MIDI file, ensuring they play back in sync with the corresponding notes. This feature adds another layer of interactivity and functionality to MIDI, making it a versatile tool for music production and performance.

Posted on Leave a comment

Chaining Multiple MIDI Instruments Together

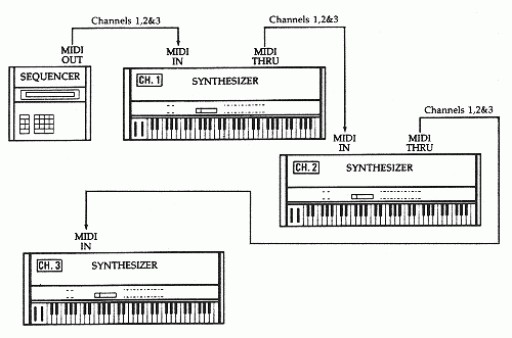
Chaining multiple MIDI instruments together, often referred to as MIDI daisy-chaining, is a technique where multiple MIDI devices are connected in series. This allows a single MIDI controller (such as a keyboard) to send MIDI data to multiple instruments or sound modules. This setup is useful in various scenarios, from live performances to complex studio setups.

How to Chain Multiple MIDI Instruments Together

To chain multiple MIDI instruments together, you will typically use the MIDI Thru port on your devices. Here’s a step-by-step guide on how to do it:

1. Start with the MIDI Controller

  • MIDI Out: The first device in the chain is usually your MIDI controller, such as a keyboard or DAW. Connect a MIDI cable from the MIDI Out port of the controller to the MIDI In port of the first instrument in the chain.

2. Connect the First Instrument

  • MIDI Thru: After connecting the first instrument’s MIDI In port, use another MIDI cable to connect the MIDI Thru port of the first instrument to the MIDI In port of the second instrument.

3. Add More Instruments

  • Repeat the process, connecting the MIDI Thru of one instrument to the MIDI In of the next, until all your instruments are connected.

4. MIDI Channel Assignment

  • Assign each instrument in the chain to a different MIDI channel. This allows the MIDI controller to send specific data to each instrument independently.

Example Setup

  1. MIDI Controller: Connect the MIDI Out to the first instrument.
  2. Instrument 1: Connect MIDI Thru to Instrument 2.
  3. Instrument 2: Connect MIDI Thru to Instrument 3.
  4. Instrument 3: No further connections unless adding more instruments.

Why Chain Multiple MIDI Instruments?

Chaining MIDI instruments together offers several benefits, particularly in live performances and complex studio environments.

1. Expand Your Sound Palette

  • By chaining multiple instruments, you can significantly expand your sound palette. For example, you can have a synthesizer, drum machine, and sound module all responding to different MIDI channels from a single controller. This setup allows you to create richer, more complex soundscapes.

2. Simplify Control

  • MIDI daisy-chaining allows you to control multiple instruments from a single controller, such as a MIDI keyboard. This is especially useful in live performances where you might want to trigger different sounds or instruments without switching controllers.

3. Layered Sounds

  • Chaining MIDI instruments allows you to layer sounds by assigning multiple instruments to the same MIDI channel. For example, you could have a piano, string ensemble, and synth pad all play the same notes simultaneously, creating a fuller, more textured sound.

4. Efficient Use of MIDI Ports

  • In setups with limited MIDI ports (such as on older devices or simpler interfaces), daisy-chaining can help maximize the number of instruments you can connect without requiring additional MIDI interfaces.

5. Complex Arrangements

  • In studio settings, chaining MIDI instruments is useful for creating complex arrangements where different parts of a composition are played by different instruments. This setup allows for more detailed and dynamic compositions.

Potential Challenges

While chaining MIDI instruments together can be highly beneficial, there are a few challenges to be aware of:

  • MIDI Thru Latency: Each device in the chain introduces a slight delay as the MIDI signal passes through. While typically negligible, this can become noticeable if many devices are chained together.
  • Limited MIDI Channels: With only 16 available MIDI channels, a large setup might require careful channel management to avoid conflicts.
  • Signal Degradation: Over long chains, especially with many devices, there might be slight signal degradation. Using MIDI signal boosters or splitters can help if this becomes an issue.

Alternatives to Daisy-Chaining

  • MIDI Splitters: For large or complex setups, using a MIDI splitter allows one MIDI Out signal to be sent directly to multiple MIDI In ports simultaneously, reducing latency and signal degradation.
  • MIDI Interfaces: In a studio environment, using a multi-port MIDI interface can help manage multiple devices more efficiently, providing direct connections from a DAW to each instrument.

Conclusion

Chaining multiple MIDI instruments together is a powerful way to expand your musical setup, allowing for more complex arrangements, layered sounds, and efficient control. Whether you’re performing live or working in a studio, understanding how to daisy-chain MIDI devices can greatly enhance your creative possibilities. While there are some challenges to consider, the benefits of a well-organized MIDI chain can be substantial, offering greater flexibility and control over your music production.

Posted on Leave a comment

How to Make General MIDI Sound Better

General MIDI (GM) is a standard protocol that allows electronic musical instruments and computers to communicate. While GM is great for ensuring compatibility across different devices, the quality of the sounds produced by many GM sound modules can be lackluster. If you want to enhance the sound quality of your General MIDI compositions, there are several strategies you can employ. Here’s how you can make your General MIDI sound better and improve the overall production value.

Understanding the Limitations

First, it’s important to understand why General MIDI might not sound as good as you’d like:

  • Basic Sound Samples: Many GM sound modules use basic and sometimes outdated sound samples that lack depth and realism.
  • Limited Expression: General MIDI can sometimes limit the expressiveness of the music, making it sound more mechanical.
  • Consistency Over Quality: GM was designed for compatibility, not necessarily for high-quality sound.

Strategies to Improve General MIDI Sound

  1. Upgrade Your Sound Module
    One of the most effective ways to improve your General MIDI sound is to use a higher-quality sound module or virtual instrument (VSTi). There are many software instruments available that provide high-quality samples and advanced synthesis options.

    High-Quality Soundfonts: Look for and use high-quality SoundFont libraries. SoundFonts are collections of sound samples that can replace the default GM sounds with better alternatives.
    Virtual Instruments: Invest in professional virtual instruments (VSTs) that offer superior sound quality and more control over the sound.

  2. Layering Sounds
    Layering sounds is a technique where you combine multiple sounds to create a richer, fuller result.

    Double Up: Use two or more instruments to play the same MIDI part. For example, layer a piano with a subtle pad to add warmth and depth.
    Use Different Octaves: Layer the same instrument in different octaves to create a fuller sound.

  3. Add Effects and Processing
    Applying effects can significantly enhance the sound of General MIDI instruments.

    Reverb and Delay: Adding reverb can make the sound more spacious and natural. Delay can add depth and interest.
    EQ and Compression: Use equalization (EQ) to fine-tune the frequency balance of your sounds. Compression can help control dynamics and add punch.
    Modulation Effects: Effects like chorus, flanger, and phaser can add richness and movement to your sounds.

  4. Use Automation
    Automation allows you to dynamically change parameters over time, adding expressiveness to your MIDI parts.

    Volume and Pan Automation: Vary the volume and stereo placement of your instruments to create a more dynamic mix.
    Effect Automation: Automate effects parameters, such as reverb amount or filter cutoff, to add movement and interest.

  5. Humanize Your MIDI
    General MIDI can sound robotic if every note is played with the same velocity and timing. Humanizing your MIDI can make it sound more natural.

    Velocity Variation: Vary the velocity of notes to mimic the natural dynamics of a live performance.
    Timing Adjustments: Slightly adjust the timing of notes to avoid a perfectly quantized (mechanical) feel.
    Randomization: Many DAWs have a humanize function that can automatically randomize velocities and timings within set parameters.

  6. Enhance with Live Instruments
    Where possible, blend in live recordings of instruments with your MIDI parts. This can add a layer of realism and warmth that purely digital sounds often lack.
    Live Overdubs: Record live instruments playing along with your MIDI tracks.
    Hybrid Approach: Use MIDI to control real hardware synthesizers or samplers and record the audio output.
  7. Mixing and Mastering
    A good mix and master can transform your MIDI tracks into polished, professional-sounding productions.
    Balance: Ensure that each instrument sits well in the mix and that no single part overpowers the others.
    Stereo Imaging: Use panning to place instruments in the stereo field, creating a sense of space.
    Final Touches: Apply mastering techniques to enhance the overall sound, including multi-band compression, limiting, and final EQ adjustments.

Improving the sound of General MIDI involves a combination of better sound sources, creative layering, effective use of effects, and careful mixing. By upgrading your sound module, humanizing your MIDI, and applying professional mixing techniques, you can significantly enhance the production value of your music. Remember, the goal is to make your music sound as expressive and dynamic as possible, bridging the gap between the limitations of General MIDI and the high-quality sound you desire.

Posted on Leave a comment

Two Keyboards is like Four Keyboards

peavey dpm3
peavey dpm3

I remember in college when I bought my first two-tier keyboard stand. It was great. I was so excited. Now all I needed was the second keyboard. Of course being a penniless, starving student didn’t allow for the extravagance of purchasing excess gear. So I went for what seemed like a really long time with just one keyboard.

At the time I had a Peavey DPM3, which was actually way more keyboard than I knew what to do with. I was completely overwhelmed by the thought of oscillators and envelopes and filters and modulators. But one thing I did know was that I had 16 MIDI channels to work with and only one set of keys. And this was a limitation that I was determined to overcome.

Although I only owned one keyboard, I knew that if I could get my hands on another one I could “MIDI them together” to access way more sounds (using different MIDI channels) than I could play with just the one keyboard. For example, in performance mode I could layer 5 sounds using MIDI Channels 1-5 and play those all with the main keyboard. Then using a second keyboard as a controller I could access another bank of 5 sounds on channels 6-10 without ever needing to change patches. So even though I was playing the two sets of keys, I would only trigger the sounds from the main keyboard.

It gets better. Using this logic, I determined that I could also do the same for the second keyboard, and at the same time. I could make my ‘main’ keyboard access the ‘secondary’ keyboard’s sounds as well.

Kawai k1
Kawai k1

So, with much begging, threatening, and bribing, I convinced my brother to loan me his Kawai K1 for the weekend and I tried it.

Not only did my experiment work…. I looked SO COOL doing it! In fact, I think my wife married me because of this. (Ahhh… But that’s a story for another day)

By hooking the two keyboards together with MIDI, I was essentially using two sets of sounds from one and two sets of sounds from the other, at the same time. That’s why having two keyboards is actually like four keyboards.

SIDE NOTE: Using this logic… Three keyboards would be like having nine. I have yet to try that one.

What do you think? Do you have any interesting ‘MIDI Chaining” stories to tell?